Thinking of knitting or crocheting a handbag, but afraid to tackle the lining? Rest assured. Bags linings are easier than you thought. Most of the time it’s just a matter of choosing the right tools and sewing straight seams. In this two-part series, I am going to describe the steps you’ll need to sew a stable lining for a knitted or crocheted bag. In this tutorial, I’ll be referring to my Hardwick Crocheted Handbag pattern, but you can easily adapt these techniques to most any similar project.
Step One – Make Templates for Lining

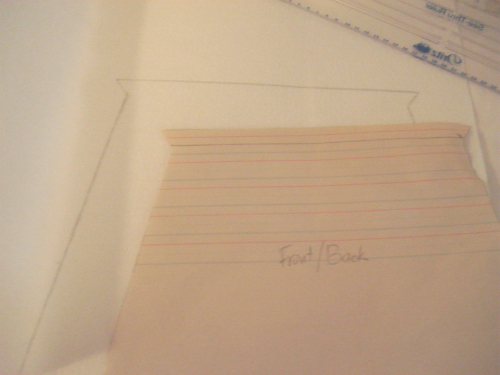
Lining templates made by tracing crocheted pieces.
Trace your knitted/crocheted Bag Pieces on paper after you have blocked them to the finished measurements called for in the pattern. However, even with careful blocking the dimensions may not be exactly symmetrical. For example one side of your front/back might measure 9″ while the other side is 9 1/4″. In this case go with the longer measurement. It all evens out in the end.
I don’t add seam allowances to the lining templates. I assume about 1/4″ will be taken from each side of the knit/crochet pieces when I assemble them. So I just sew a 1/4″ seam for the lining pieces. I want the knitted/crocheted fabric to fit snugly over the lining.
Finally, I add 1″ to the top of each Front/Back piece to serve as place for the magnetic snap closure. Notice the top template in the photo above. The 1″ extension doesn’t go straight up from the top. Instead it is angled. This is important because this portion will be folded down before sewing the side seams. More on how this will work in part two.
Step Two – Choose your Lining and Stabilizer

This is the stabilizer/interfacing I choose for this project. Cut it with craft scissor, not your good sewing shears.
Select a lining fabric which will go with your knitted/crochet fabric. Feel free to match colors or patterns, or choose a contrasting color for visual interest.
Decide how stiff you want the finished bag to be and choose an appropriate stabilizer. Fabric interfacing ranges from whisper thin to rock hard. So take your knitted/crocheted pieces to the fabric store with you to audition the various options.
You’ll also want to decide whether you want to cover both sides of your lining with fabric. Lay your knitted/crochet piece against the interfacing you want to use. (It is probably white, but not always.) Are there gaps in the knitted/crocheted fabric? Does the interfacing show through? If so, does it bug you? If it bothers you, you’ll want to choose a fabric which will look right when showing through the small holes in your knitted/crocheted piece. Remember, you’ll need twice the amount of fabric than you would if you were only lining the inside of the bag if you opt for a 2-sided lining. And if you’re using fusible stabilizer, you will want to make sure it is double-sided.
For this project, I wanted a very stiff stabilizer. I also wanted to cover both sides with fabric, so I choose Pellon’s Peltex 72F Double Sided Fusible Ultra Firm Stabilizer. It’s about as stiff as the cardboard used to make shoe boxes, but cuts and sews very easily.
Step Three – Cut Fabric and Interfacing (Stabilizer)
Trace the template onto thick stabilizer to avoid dealing with pins.
Using your new templates, cut out the pieces. The stabilizer is so thick that I choose to trace the templates onto instead of pinning. I also used craft scissors to cut it out and saved my good sewing shears for the lining fabric.
In my Hardwick bag, the lining meets up with the top of the knitted/crocheted fabric. So I placed the top edges of my front/back and side lining pieces on the fold of my lining fabric. This makes a neat finished edge at the top.

Cut Front/Back & Side lining fabric on the fold to give the top a nice finished edge.
Bottom: Cut 2 from fabric, Cut 1 from stabilizer
Front/Back: Cut 2 from fabric on fold, cut 2 from stabilizer
Side: Cut 2 from fabric on fold, cut 2 from stabilizer
Step Four – Adhere Stabilizer to Fabric
This is the easy part. If you are using fusible stabilizer, just follow the enclosed directions. If not, just attach the fabric to the stabilizer using a basting stitch around each piece.
Stay Tuned…
If you follow these steps you will have made templates based on your knitted/crocheted pieces, selected appropriate fabric/stabilizer, and cut out all the necessary lining pieces. In part 2 of this tutorial, I described the sewing process and how to attach your magnetic snap closure.
SIGN UP for my newsletter to get more how-to’s, fiber arts news and discounts on my patterns.

Pingback: How to Sew a Lining for a Knitted or Crocheted Bag, Part 2 | Quaternity Design Studios·